Thursday, June 30, 2011

My husband, the stripper


It's a good thing my husband doesn't care about crafting, sewing, or thrifting, and so he never checks this blog. I'm pretty sure he would not approve of the title ;)

The hubs is a very patient person. Way more patient than me. I do not like to strip furniture. I like to slap another coat of paint on it and call it done. He felt that this dresser needed stripped before it received another coat of paint.


Note the detail on the dresser drawers.
Lots of details equals lots of angry four letter words if I were to do the stripping!


I might mention that this is the fourth time I've painted this dresser, and it was painted once before I got it too. It was black when I got it at an auction years ago for $10. I painted it a light blue but didn't like it, so I painted it white. It stayed that way for a while, and then when the first bun was in the oven, I painted it light green to go in the nursery.

Pfew. That's a lot of coats of paint.


It's hard to tell in this photo, but the knobs are made to look like blocks


It's no longer needed in the nursery as we've gotten a bigger, better dresser, and so I'm painting it white again to go back into the master bedroom as my bedside table.

Stay tuned!

Tuesday, June 28, 2011

More thrifted goodies in the big boy room

Just when I think I'm done with a room, I go and run into more thrifted cuteness that I can't pass up!


I picked up a plain black frame for under a buck. When I got home, I filled it with a page from one of my son's firetruck books. My husband spazzed out when I told him it came from a book ... he said that was his book when he was little. Oops. I tried to calm his nerves by telling him that it was just the title page, and the book is still totally readable, but he was still a little miffed. Sorry babe.

The el cheapo 59c plastic antique car frame was pretty hideous when I saw it sitting on the shelf at the thrift store. I actually didn't even give it a second glance the first time I walked the aisles. Luckily for me, I tend to take a second pass through the aisles!

And that's when I saw it. I'm pretty sure I heard angels singing in the background when I picked it up. It was perfect for Joel's room, so I snatched it up.

Ugly, no? (And believe me when I say it was even uglier in person.
And did I mention it's plastic?)


Much better with a fresh coat of red spray paint! Have I mentioned that spray paint is my BFF right now? I don't know how I would get along without it!


There was also a fire station picture on a canvas that I had seen the past couple times I went to that thrift store. I picked it up and set it back down about eight times over the past week or two. I finally decided that it was fate that it was still sitting there, so I scooped it up and made it mine. It was $3.

Last but not least, I have been on a corkboard kick lately. I had one already that needed a new fabric covering and a fresh coat of paint, and I found another one on that thrift store outing for a whopping 90c. I thrifted a couple of long sleeve button-up shirts ($2 and $1) to give the corkboards a facelift. I figure when the boys are a little older, we'll hang their artwork from their special corkboards. I don't trust Joel with pushpins just yet!

Monday, June 27, 2011

Fitted Tablecloths are all the Rage

Aren't these a good idea?

Fitted tablecloths! Who'd a thunk it? ;) This tute over at smashedpeasandcarrots is for a square or rectangular table. Let me tell you people, it is much simpler to sew a tablecloth for a square/rectangular table than a round table! (And I know this because I made one of each).


Kris over at Resweater made one too; her table is round like our kitchen table. For round tables, elastic is the key to keeping the tablecloth snug. Snug as a bug in a rug!

I had thrifted this vinyl tablecloth a long time ago because I loved the fruit motif on it, especially the cherries! It was large enough that I could cover our round kitchen table, as well as cover the little table that our son sits at :)

Voila! Matching tablecloths!


Saturday, June 25, 2011

Thrifted Toddler Clothes Fashion Show

This plaid button up shirt was 50 cents!
He was very proud of himself for walking up the slide and then going down the steps :)

Picking pumpkins! This football tee was 40c

Still fits into that tee the following spring :)

These bibs were higher than I normally go, but for $1.50 I bought them anyway. Joel loves anything monkey! The green turtleneck underneath was 45c.

I couldn't pass up these Ohio State bib overalls, even though they were $1.50.

I love, love, love this Carters jacket. It was only 45c.

Another shot of the ca-utest jacket! Oh, and the kid is cute too :)

This Future Rock Star is sporting a 50c shirt and a brand new haircut.
Not shown: throwing a temper tantrum because he hates getting his haircut.

Sometimes I buy girl things, not realizing it. Don't look too closely, but these $2 snowflake PJs are definitely for little girls. Lacy trim is a dead giveaway.

Thrifted plaid shirt and blue shorts. Probably 50c each, since I very rarely spend more than 50c on children's clothes, unless the piece is really something special!

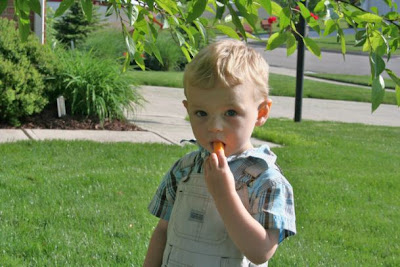
Mmmmmm.... cheese stick!
This blue and brown plaid button up shirt was a score at only a quarter!
(Do I dress my son in too much plaid?)
The bib overall shorts were 50c.

The plaid shirt was a birthday gift, but the Monster Truck tee was 45c :)

Thursday, June 23, 2011

Photos from Around the House: the Boys' Bathroom


We've been in this house for about 10 months now, so I think it's high time that we get things up on the walls, don't you? During the school year while I'm teaching, there's not much time for doing anything crafty or decorative (or cleaning and unpacking apparently!). Now that it's summer vacation, I've been rolling up my sleeves and getting to work. I have a long ways to go but I think I can do it! I just might need a swift kick in the @ss some love and encouragement along the way!

I'm going to set a goal for myself that every three days, I'm going to photograph and blog about one finished room in the house. Um, we better make that every five days. Or maybe every seven. Many rooms are close to completion (and a few are actually done!), so this shouldn't be that hard, right?

Since I already blogged about my son's room the other day, today we'll start with one of the only other rooms in the house that is finished, my son's bathroom. Isn't it ca-ute?! It's my favorite room in the house, and it's almost completely thrifted. Woot, woot!

Here's a list of all the things that I thrifted for this room: the shower curtain, the little white thingies that attach the shower rod to the wall, still new in the package for something like 30c, the framed lion print, the giraffe picture frame, and the tissue box (which was hideous until I added a fresh coat of chocolate brown spray paint) . I already had the blue rug from the old house, so that didn't cost me anything this time around. I did splurge on the monkey rug and the monkey hanging over the toilet. The rug was from Target for $20, and the monkey wall art was about ten bucks at Babies-R-Us if memory serves me right. But my son loves monkeys, and so it was worth it :)


The paint was an "oops" paint so that only set me back a couple bucks. I also used it in the laundry room because it's so bright and cheery! I have almost the whole entire gallon left, so I can come over and paint your bathroom and/or laundry room bright blue too if you want :) I work for cookies. Or ice cream. Or pickles. Wait, that was the pregnancy talking there for a moment.

You can't tell from these pictures, but I also used paint to spruce up the light fixture. All of the bathroom lights in this house were brass. So were all the cabinet and drawer pulls. Yuck. I hate brass. I spray painted the bathroom lights with a brushed nickel spray paint and replaced all the cabinet hardware in the whole house. In this bathroom, the pulls were in my stash already.

Yes, I have a stash of drawer pulls.
No, I'm not a hoarder. (I bet all hoarders say that).
You just never know when you might need one, you know? Be prepared, that's my motto.

These cute blue stars were a garage sale find years ago. I'm so glad I finally got to use them! They look really cute in here :)


Just outside of the bathroom, I hung a monkey peg rack for my parents' towels when they come down for a visit. It was on clearance at TJ Maxx for $8, because the paper was curling off of the wood. Nothing a little modpodge couldn't fix!

Wednesday, June 22, 2011

Handmade Baby Shoes Minus the Interfacing

Yes, that's right. In my haste excitement, I completely forgot to add in the interfacing. I've always shied away from projects involving interfacing because I didn't have any and was too cheap to buy some. I always figured I'd find some at a thrift store when it was meant to be. A few days ago I finally found some, new in the package, for... wait for it... thirty cents, and I knew right away what I wanted to do!

Equipped with an awesome tutorial at michaelmillerfabrics.com, some elastic, fabric and interfacing, all thrifted, I set out to make these baby shoes. It wasn't as tricky as I thought it would be. Here are baby Jonas's little safari shoes :)


This is the shot of the sole. I think it's pleather.
I should totally make Joel a pleather motorcyle-ridin' jacket :)

Tuesday, June 21, 2011

Dress and T-shirt Hacked into a Maternity Skirt


{24 weeks and still going strong, baby!}


I'm on a red and teal kick right now. Maybe it's the fourth of July coming up. Maybe it's my son's bedroom redo. But when I saw this forgotten cut-up dress in my stash (that I thrifted eons ago for its fabric), I knew right away it would make a nice Independence Day maternity skirt.

I currently have a large pile of t-shirt scraps scattered about lying on my dining room floor, leftover from making baby gowns and t-shirt/shorts sets for my boys. I picked up all the reds that still had the bottom hem, pieced them together, and voila! A belly band!

This is the inside of the belly band. Not the prettiest. You would probably want to use thread that matches your fabric. Personally, I'm lucky if the thread in my bobbin matches the thread up top.


See the top portion of the belly band? That was originally the bottom hem on the t-shirt. That's why it looks so straight and pretty and professional. I'm all about reusing existing t-shirt hems to cut down on the amount of work I have to do. The bottom portion? Yeah, I did that part. That's why it's jagged and ugly. I really can cut straighter than a first grader. I'm going to blame it on the scissors. I think they need sharpened or something.


I cut the skirt portion off of the dress, machine basted around the top, and gathered it to match the length of the belly band. Pin right sides together, sew, and you're done! Talk about a quick project!


If you need more detailed instructions, you can find lots of tutes online on how to turn existing clothes into maternity clothes. Probably the most recent one is by Trudy. She goes into way more detail and gives you lots and lots of photos along the way. Instead of using t-shirt scraps, she cuts a tube of fabric from a cami. Either way, easy peasy!


A big boy bedroom and handmade bedskirt


{Joel's first third piggy bank. They're all empty}


A little over a month ago, we made the big move from crib to twin bed! We figured that we better get Joel out of the crib plenty of time before Jonas needs it, so that perhaps he'll forget that the crib was "his." He is a very possessive little thing, and when Jonas arrives, we don't want him to feel like he's been kicked out of his bedroom.

We decided that it would be easier to keep the crib and nursery set up the way it is and just move Joel into one of the other bedrooms. (It was my sewing room, of course, that got the boot. Again. This happened to me at the old house too when Joel was born).

Of course we had to set up his big boy bedroom on the cheap! By the way, the photos don't do this room justice. It's actually very cute in real life! The lighting was bad, and I'm not a great photographer, so excuse the photos!

Anyway, here's the skinny:

Paint: I don't like to buy full price for paint, as I usually buy the Oops paint, but I splurged this time so that I could get just the right shade of blue.

Window treatments: These I bought new because I needed the black-out kind, and I needed them stat. The back of our house gets H.O.T. from the sun coming in. I'm talking greenhouse hot, people. I figured the black-out curtains would help. I think they were about $25 for the pair. (Ouch).

Dresser and TV stand: Free! The dresser was mine growing up, and Jason had the TV and stand in his apartment before we met.


Toy storage: My grandpa made this barn toy box for my dad some 50 years ago. It hadn't been painted in like 50 years, so that was the first thing that I did gto spruce it up. I added some wallpaper scraps of firetrucks, but then Joel ripped almost all of them off. I think I'll try again, this time with modpodge. I'm still going to make a little curtain for the bottom and some kind of fabric covering that rolls back and is held with velcro for the top. So please excuse the mess! The red bins I bought a couple years ago at Target. They were on clearance after Christmas for I think $2.50 apiece. I bought all they had :)

Thing keeping my son from falling out of bed: That was thrifted for two or three bucks. The funny thing is, Joel hasn't figured that he can get out of bed in the middle of the night. He stands there with his arms up, wailing, "Mommy! Mommy!" until I come get him. One night I found him trying to climb over it to get out of the bed! Geesh, child!

Bed frame: free from the in-laws, however they had left it outside lying in the grass for awhile (don't ask), where of course it got all nasty and rusty, so it needed some TLC. The wheels/feet were missing too. Did someone seriously go into their yard and steal the wheels off of the bed frame? Who does that? Probably the same person who stole the lids off our trashcans, and/or the person who stole the doghouse right out of our yard. Jerk. Sorry, I'm digressing. Anyway, luckily I already had some thrifted casters that we attached to the frame. It's really low to the floor, but I guess that's a good thing for a toddler! Ah, the silver lining.

Headboard: a thrift store find for a whopping $3.93. There is a chip out of one of the legs, however that gets hidden by the bedskirt. I was superstoked when I got it home and discovered that the wood tones do indeed match the dresser!


Mattress & boxspring: we bought these back in August when we put the old house on the market. (We used it for staging).

Bedding: we had all that bedding already, with the exception of the bedskirt, which I made with fabric I already had in my stash. The truck fabric was originally thrifted curtains. I cut them in half long-ways to utilize the upper and lower hems that were already there, because I'm a total lazy sewer to save time and energy. I sewed the unhemmed sides to a piece of large white felt since that part will be under the mattress and won't be seen. (The felt was a freebie too... we bought a new leather recliner, sofa, and loveseat when we moved into this house, and they came wrapped up in the felt. Of course I couldn't throw away yards and yards of free felt!) Finally, I made a pretend box pleat where the two pieces of truck fabric came together. In case you're wondering, a pretend box pleat is really not a pleat at all. I simply sewed a piece of red fabric from my stash to the white felt, under where the two pieces of truck fabric met. Once again, because I'm a lazy sewer. Super simple, and it does the trick!


Ceiling fan: (Not pictured because I couldn't get a good photo of it). I found two, almost brand new ceiling fans at a thrift store for $13 each! I was totally stoked! Luckily, my father-in-law is good with electricity, and he installed them for us :) Someone must have moved into a house that was a couple years old and ripped out the ceiling fans and donated them. Lucky me!

Picture Frames & Wall art: Several of the things hanging on the wall were thrifted or garage sale finds. I thrifted the Engine Number 9 metal sign years ago for $3 because I liked it, even though at the time I had no children and nowhere to hang it! The ambulance print was still new with tags, half off at Goodwill. $2.50! The race car print set me back $3. It originally had an ugly wooden frame, which I spraypainted black to match the rest of the frames. I bought the shelf for $5 at New Uses. It was originally purchased for staging the old house. The red and blue picture frames were 50c apiece at a garage sale. The wall decals were Meijer clearance- after the 75% off, all those decals were only $5. Score!


Thrifted little stair-step thingie: I painted Joel's name on it. It actually had some girl's name carved into it, so before I could paint Joel's name onto it, I had to fill in the girl's name with spackling and then prime and repaint it white. I like how it turned out :) He loves going "updairs" and "downdairs" on it!


Thrifted car rug: This was still new with tags for $5!


Eventually I'll get around to showing you photos of the nursery :)

Monday, June 20, 2011

Upcycled Toddler Tees and Matching Shorts

There's no doubt about it.... I am certainly in the nesting phase of this pregnancy. I have been sewing and getting ready like there's no tomorrow these past few days. We even steam cleaned my mother-in-law's carpets the other day because 1)it was her birthday and she wanted them done, and 2) I want Jonas to be able to roll around on clean carpet when he gets here :)

A week or so ago my sewing machine focus was on finishing Joel's upcycled tee and short sets. I made them about a year ago, however after I made them I realized that they were way too big for him at the time. Of course, this time when I got them out of the closet, several of them were a little too short. I fixed this by letting out the hem and then adding coordinating t-shirt scraps around the sleeves and the bottom to create a faux layered look. I decided against sewing in the faux layers and instead opted to use some fusible hem tape. I love how it turned out. This one will be his Independence Day outfit :) Please excuse the slight wonkiness on the front. The hem tape came loose a little... I'll fix that later on today.


By the way, there are matching shorts for all of these tees, however most of the time, he wasn't wearing the matching shorts when I took the pictures. (We've been using the shorts as PJs bottoms since they're so comfy!)

The next two fit well just the way they are, so I didn't add anything around the hems. This one was the perfect shirt for Father's Day!


And this one is my personal fav :)


For this shirt, as well as all the others, I was able to use the necklines and the sleeve hems of the existing shirts to cut down on the amount of time it takes to make the shirt, as well as to make the finish product look more professional. (I'm not very good at sewing in straight lines!) All of the bottom hems are sewn by me though, which was a bit of a problem when it came to this shirt. The bottom obviously needed white too since all the other openings were white. Since I had no ribbed fabric on hand and I'm too cheap to buy some, I used white t-shirt scraps to make a bias tape and sewed it on. It doesn't match since it's not ribbed, but I guess it's not too noticeable.


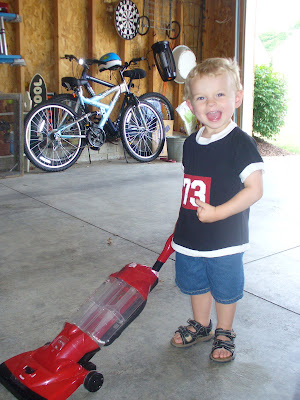
{cute little boy sweeping with his newly thrifted vacuum cleaner}


For the tank top, I made double sided bias tape from t-shirt scraps and sewed it around the openings. For the coordinating shorts, I once again did the layered look by adding in some black t-shirt scraps. For all the faux layers, I was able to utilize the existing hems in the t-shirts. Score!


And because I had used up all the thrifted tees in my stash, you know I had to run right out and thrift some more!

The only problem is, I really don't like weekend thrifting. By the time the weekend rolls around, the 50%/75% colored tags are pretty much picked over, since the colors change on Mondays. Nonetheless, I had the itch to go thrifting on Friday, and so off I went. Not to mention, Father's Day was just around the corner, and I was hoping to find my hubby something special. That didn't happen, since I never find anything that I'm actually looking for... thrifting is all about stumbling upon things you didn't know you needed :) I did find a pair of vintage binoculars that I thought would make a cool gift, however they smelled pretty funky, so I passed. I've been wanting to get the hubs some binoculars ever since we moved into this new house. Our backyard looks out onto a bird sanctuary!

Anyway, all the adult tees I bought were 99c with the exception of the first one, which was $1.99.

I put Ketchup on my Ketchup ... I saw the kiddo version of this shirt while we were on vacation. We almost got it for Joel but didn't because of the high price tag. Joel really does eat ketchup on anything. He even dips tomatoes in ketchup. (And I'm not even kidding). Does that make me a bad parent?


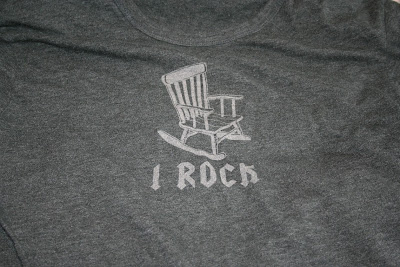
I Rock. Need I say more since there's a baby on the way?


Peeps in the Hood ... perfect for an after-church Easter shirt!


A brown skull tee for Halloween. Check out the gold teeth :) I really bought this one mainly because I need to make Joel a pair of brown PJ shorts to match his monkey PJ tops.


Chillin with my Gnomies. When Joel saw this one, he exclaimed, "Santa!"


Lucky Shirt for St. Patty's Day


You can never go wrong with a shirt with a skunk on it!