For Halloween, I thought it would be cute to dress up the
(And by the way, I do realize it's not even Independence Day yet!) Anyway...
I plan on taking one of his dress shirts, a pair of white pants, and a tie, and dying them all yellow with RIT dye. That way, all the yellows match. Aren't I smart? :)
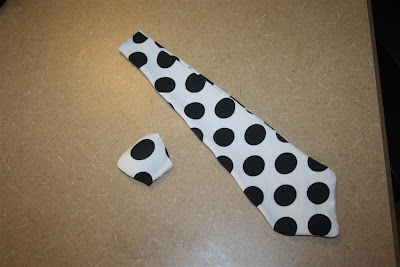
I'm going to make him a pair of pants out of a white linen skirt that my sister-in-law didn't fit anymore. For the tie, I thrifted a white t-shirt with large black polka dots for $1. When I saw the fabric, I knew it was just right!!!
Since this fabric is t-shirt material, I thought I'd just make a mock tie. (You know, a tie that's not really a tie at all). T-shirt material is just way too wonky for the real deal. I must warn you: there's hot glue involved. It just needs to last one day. This is the quick and dirty way to get the tie look without all the time it takes to make one the right way.
I took a few pictures as I went, but they're not the best. So sorry. It's hotter than @*#%^&$#, and I just didn't feel like going outside to get better lighting.
I drew and cut out a tie on a piece of newspaper for a pattern, held it up to my son, figured the size was just about perfect, and got to cutting the fabric. With right sides together, I cut two ties out and sewed them together. I sewed all the way around except for the top - I used the top hole to turn it right side out. Iron flat if you're perfectionist. If not, that's cool too. I sure didn't. You can topstitch the opening closed once the tie is right side out. I didn't, but it would look a little nicer from the back if you do. It won't really matter because the back is not going to show, so either way is fine.

Now it's time to start the faux knot. You will need a hot glue gun, some polyfill, a little more matching fabric, and something thin and plastic that you can cut... like a butter lid or something like that. I used a lid from a plastic Gerber baby food container.
Freehand a knot onto your plastic lid and cut it out. Hold it up to your tie to make sure it's the right size. Take your fabric scrap, wrap it around your knot, and begin hot gluing it down on the back. Hot glue down all the sides except for the top of the knot.

Before you glue down the last side of the knot, stuff in a little poly fill until you're satisfied with the look of the knot. Then go ahead and glue the last side down. Make sure you remove all the hot glue stringy things. You can see I forgot to do that before I photographed it.

Then I hot glued the knot to the top of the tie, added some stick-on velcro to both the back of the tie and the shirt, and voila, you're done!


Oh wow! that's nice to see. Brilliant idea
ReplyDeleteThanks! Not so much brilliant as lazy :)
DeleteJodie